Finger-placement work gives you a simple way to examine a note that buzzes, arrives late or mutes a neighbouring string. The patterns are useful because they reduce the amount of music you must manage while listening. Choose one contact or transition to improve before repeating the whole sequence.
Place a finger near the fret and sound the note with a controlled attack. Compare the result when the contact moves slightly. Then approach the note from the previous position. A shape that works when placed without time pressure still needs a reliable route into it.
Keep track of the strings that must remain free to ring. A finger can produce its own note clearly while touching another string that belongs to a sustained voice. Test the notes separately, then combine them and listen to their full durations. This turns a vague coordination problem into a specific movement to practise.
Use a short, even pattern and release between attempts. When the movement becomes clearer, return to a phrase from your piece and check the same contact there. The goal is a dependable musical result, not a finger pattern played as quickly or as many times as possible.
What this exercise helps you change
- Buzzing
- Fingers flying away
- Excess pressure
Your practice steps
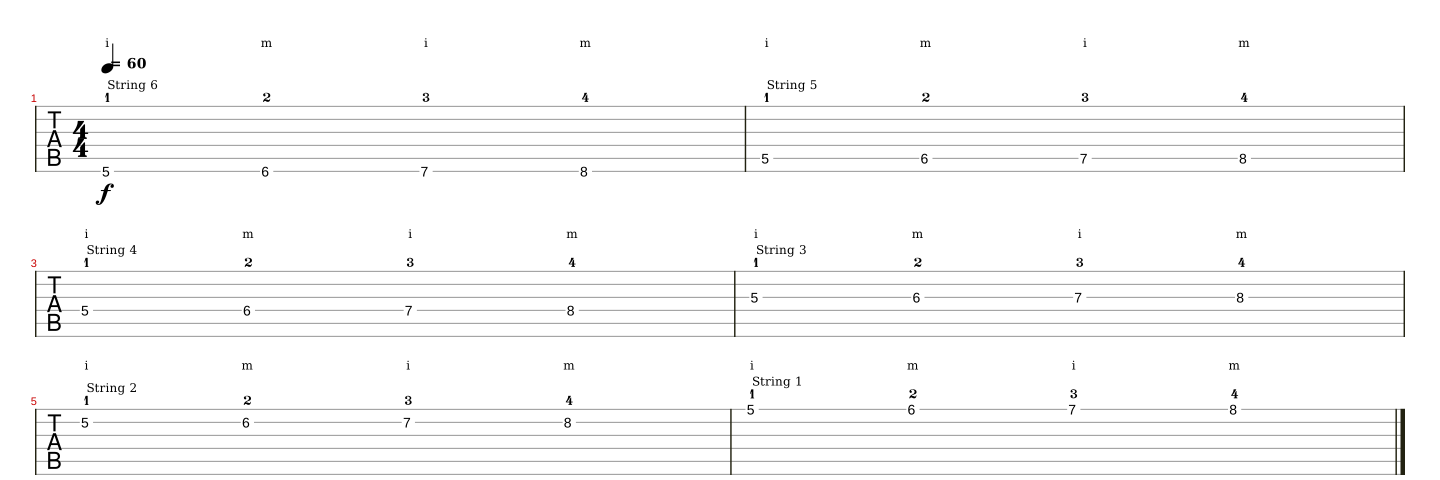
1. Place 1-2-3-4
On string 3, play frets 5-6-7-8 with fingers 1-2-3-4. Leave each finger down as the next one arrives.
Practice reference: 60 bpm · 1 attack per click.
Your checkpoint: All four notes ring without buzzing.

Read the complete static tab · Download the alphaTex file

The player and its sounds load when you choose to use them.
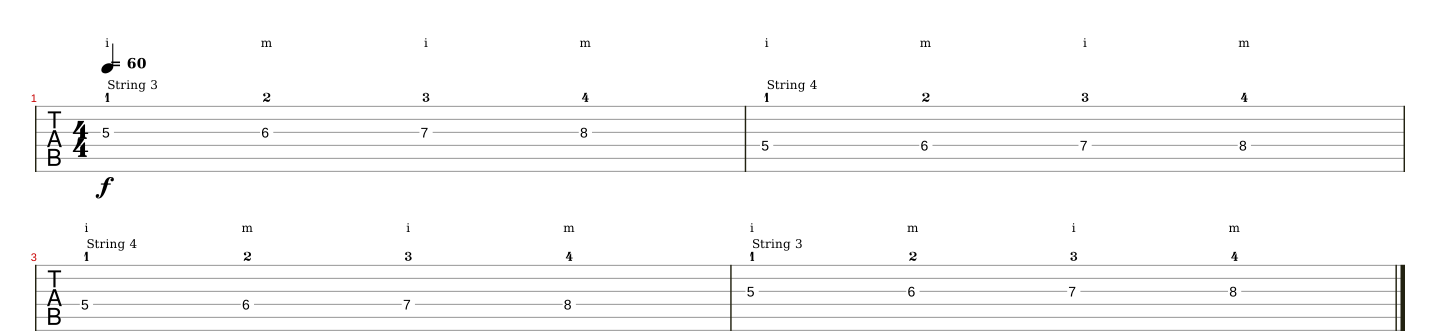
2. Move one finger at a time
Move only finger 1 to string 4, then follow with 2, 3 and 4. Continue across the other strings, then return.
Practice reference: 60 bpm · 1 attack per click.
Your checkpoint: The waiting fingers stay in place.

Read the complete static tab · Download the alphaTex file
The player and its sounds load when you choose to use them.
Other versions to read
3. Adjust the placement
Place each finger on its tip, just behind the fret. Keep your thumb behind the neck and your fingers curved.
Fingers 1 and 4 may lean slightly outwards; 2 and 3 stay more perpendicular.
Your checkpoint: Each string remains free to ring.
Read the complete static tab · Download the alphaTex file
The player and its sounds load when you choose to use them.
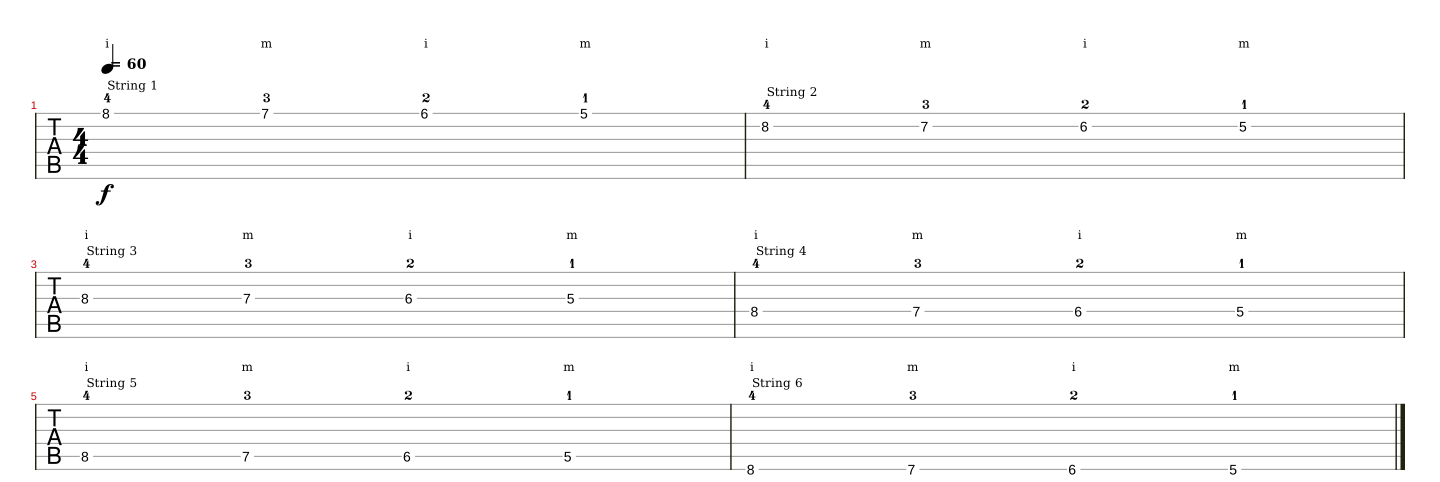
4. Switch to the piston movement
Play 1-2-3-4 again, lifting each finger after its note. Let it hover very close to the string.
Practice reference: 60 bpm · 1 attack per click.
Your checkpoint: No finger moves more than one centimetre away.

Read the complete static tab · Download the alphaTex file

The player and its sounds load when you choose to use them.
5. Find the minimum pressure
Release a note until it buzzes, then add just enough pressure. Keep that feeling through the next run.
Your checkpoint: The note stays clear without unnecessary squeezing.
Read the complete static tab · Download the alphaTex file
The player and its sounds load when you choose to use them.
6. Change the combination
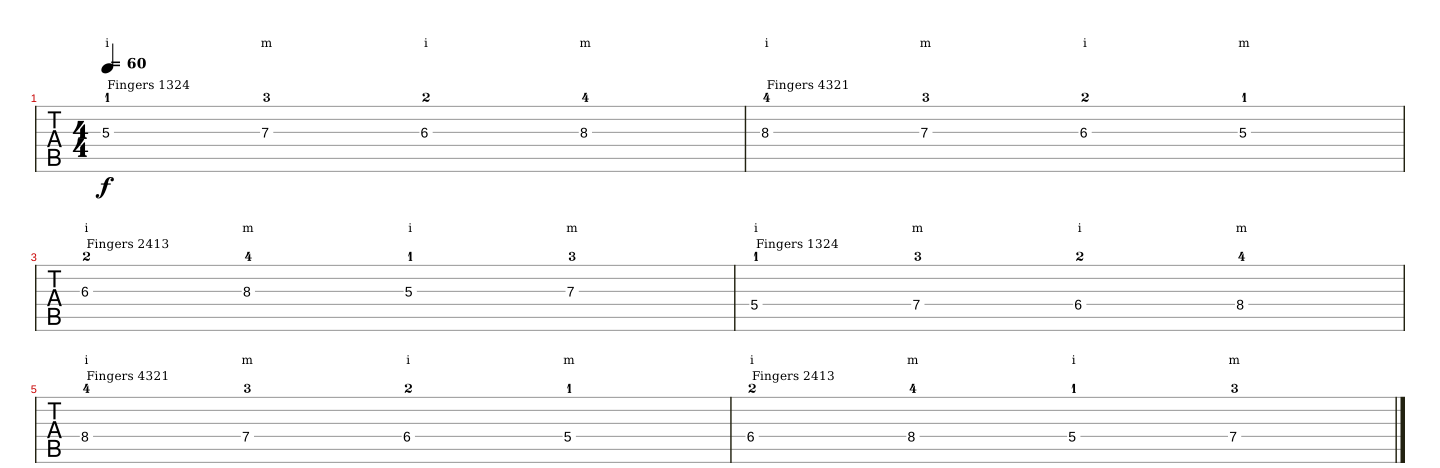
Play again with 1-3-2-4, then 4-3-2-1 and 2-4-1-3. Keep the same small movements.
These variations come from exercise 4 in the guide.
Practice reference: 60 bpm · 1 attack per click.
Your checkpoint: Changing the order causes neither buzzing nor fingers flying away.

Read the complete static tab · Download the alphaTex file
The player and its sounds load when you choose to use them.
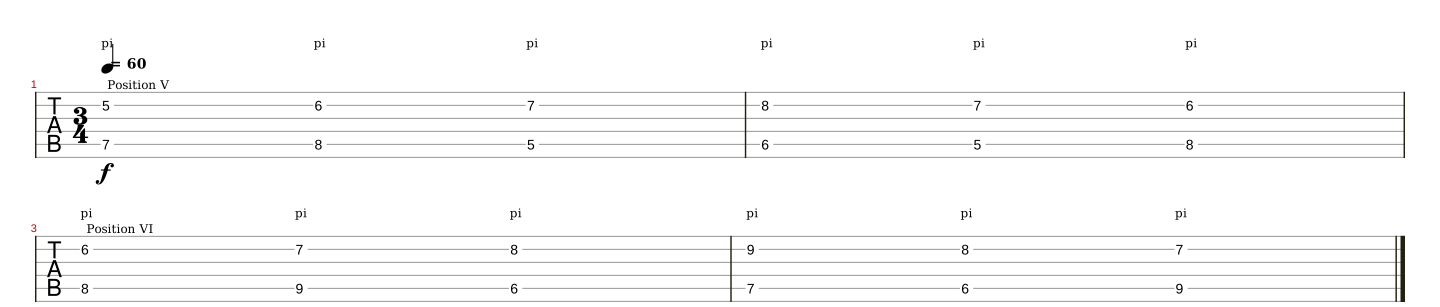
7. Add the spider exercise
Follow Werner's demonstration to move the fingers in diagonal pairs. Keep your fingers curved and your wrist relaxed.
Other variations in the guide: Werner's independence work with fixed fingers; CGC's chromatic scale in octaves, preparing the next finger. Choose just one variation per block.
Your checkpoint: The fingers that stay down do not move.

Read the complete static tab · Download the alphaTex file
The player and its sounds load when you choose to use them.
Common difficulties and corrections
Your fingers lift too far.
Repeat the piston movement slowly, keeping your fingers hovering close to the string.
Return to step 4You squeeze the neck too hard.
Release until the note buzzes, then add only the pressure it needs.
Return to step 5All the fingers move together.
Practise the move from string 3 to string 4 again, one finger at a time.
Return to step 2Your wrist bends sharply during the spider exercise.
Stop the variation and return to curved fingers and a relaxed wrist.
Return to step 7Watch and listen
Choose the recording that matches your current goal. Videos load only when you select them and require an internet connection.
Lesson · This is Classical Guitar
Before the fixed-finger variation.
English commentary. Link and metadata checked for our selection.
Lesson · This is Classical Guitar
Before trying the spider exercise.
English commentary. Link and metadata checked for our selection.
Performance · Classical Guitar Corner
To see finger placement and the piston movement.
English commentary. Link and metadata checked for our selection.
Sources and transcription choices
- Classical Guitar Corner — 7 exercises
- Niedt — Left-hand exercises
- Werner — Spider exercise
- Werner — Left-hand finger independence
The notes follow the credited sources. Fingerings, phrase divisions and practice tempos are editorial learning choices. How our transcriptions work.